Ensuring your engine is in top shape is crucial for maintaining vehicle performance and longevity. One essential diagnostic tool for assessing engine health is the compression test. This test measures the pressure in an engine’s cylinders, helping identify potential issues with the engine’s internal components. In this guide, we’ll walk you through the steps of performing a compression test, preparing your vehicle, disabling the ignition system, and interpreting the results.
Prepare Your Vehicle & Disable the Ignition System
Before you begin the compression test, it’s essential to prepare your vehicle properly. Start by ensuring your engine is at operating temperature, as this will give you the most accurate readings. Then, gather the necessary tools: a compression tester, a spark plug socket, a ratchet, and a wrench.
- Safety First: Park your vehicle on a level surface and engage the parking brake. Wear safety gloves and goggles to protect yourself from potential hazards.
- Remove the Spark Plugs: Disconnect the spark plug wires and use a spark plug socket to carefully remove each spark plug. This will relieve any pressure and make it easier to crank the engine during the test.
- Disable the Ignition System: To prevent the engine from starting while you crank it, you need to disable the ignition system. Depending on your vehicle, this can be done by disconnecting the ignition coil, removing the fuel pump fuse, or unplugging the fuel injectors. Consult your vehicle’s manual for specific instructions.
Record the Reading and Interpreting the Results
With the preparation complete, you can now proceed with the compression test.
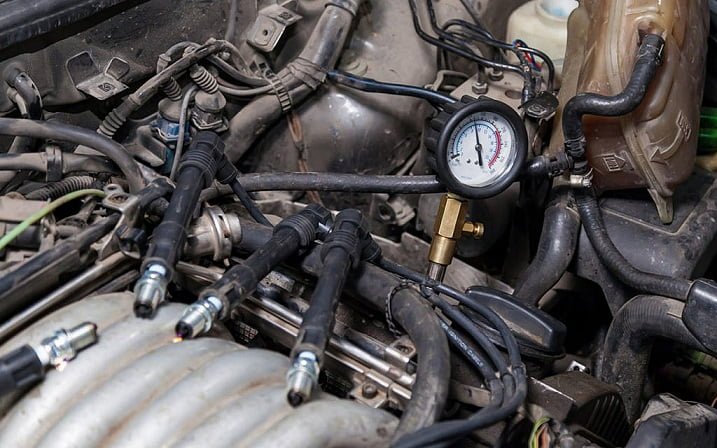
- Attach the Compression Tester: Screw the compression tester into the first spark plug hole. Ensure it’s securely connected to avoid any leaks during the test.
- Crank the Engine: Have an assistant turn the ignition key to crank the engine several times (about 5-7 rotations) while you observe the compression gauge. Record the highest pressure reading achieved. Repeat this process for each cylinder, making sure to write down the readings for comparison.
- Interpreting the Results: Once you have recorded the readings for all cylinders, it’s time to interpret the results. Generally, a healthy engine should have compression readings within the manufacturer’s specified range, with minimal variance between cylinders. Significant differences in pressure between cylinders can indicate issues such as worn piston rings, damaged valves, or a blown head gasket.
- Consistent Low Readings: If all cylinders show consistently low readings, this could suggest a problem with the piston rings or a timing issue.
- One Low Reading: If one cylinder has a significantly lower reading than the others, it could be a sign of a damaged valve or a head gasket issue.
For example, if you’re working on a Volkswagen Passat engine or any other vehicle, and you notice a discrepancy in the compression readings, it may be time to investigate further or consult a professional mechanic. Additionally, if you find that an engine rebuild or replacement is necessary, AutoZone offers a range of high-quality options, such as a replacement engine for Toyota Pickup, ensuring you can get your vehicle back in optimal condition.
In conclusion, mastering the compression test is a valuable skill for any vehicle owner or DIY mechanic. By following these steps, you can effectively diagnose potential engine issues and make informed decisions about necessary repairs. AutoZone provides all the tools, parts, and guidance you need to maintain your vehicle’s performance and reliability.
Read More: Proxiyum: Best Option for Secure and Unrestricted Browsing